Order in next 12 hours and 8 minutes for despatch today.
UK Post £4.95. Spend £30.00 more for free UK postage.
Order in next 12 hours and 8 minutes for despatch today.
UK Post £4.95. Spend £30.00 more for free UK postage.
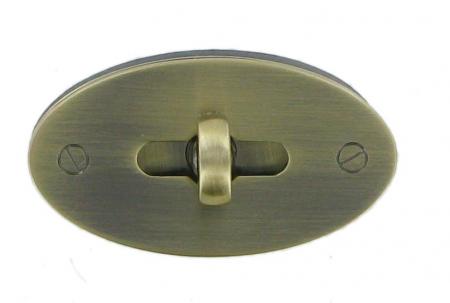
Antique Brass Finish Handbag Turnclasp, Small
UK Post £4.95. Spend £30.00 more for free UK postage.
Product Code: CTL8
This replacement flap catch is quite common in flap over handbags. It comes in antique brass colour and with a back plate for the turnkey base plate together with a screw together front plate. This is second in popularity only to the larger version C1212 when replacing some of the Mulberry turnkey fittings.
Dimensions are as follows:
Top Plate (with the hole in): 48mm x 26mm
Bottom Plate (with turn key): 45mm x 23mm
Turn Key Length: 19mm
Hole Dimensions: 19mm x 8mm
If you have any queries about the suitability of this luggage spare or would like us to carry out the repair, please call +44 1494 775577 and ask to speak to Paul.
Choose options: |
Any questions? Call Sara or Paul on 01494 775577 (if not from UK please call 0044 1494 775577) Mon-Fri 9.30 a.m. to 5.00p.m.
Other pictures
Antique Brass Finish Handbag Turnclasp Small

Antique Brass Finish Handbag Turnclasp Small
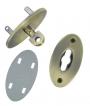
Antique Brass Finish Handbag Turnclasp Small

How to Replace A Handbag Turnclasp
Replacing A Handbag Turnclasp | ||||||||||
| Step 1 | Check that the back plate is compatible with the existing front plate. | |||||||||
| Step 2 | We would unstitch a seam and fix the plate but you might find it easier to cut the lining. This can be very neat if executed correctly. | |||||||||
| Step 3 | Once you have made a neat cut inside the lining, you will probably see the patch that covers the back of the catch, peel this off. | |||||||||
| Step 4 | The next step is to lift the legs of the broken clasp (sometimes there are screws instead. Take the backplate off and release the broken clasp. | |||||||||
| Step 4 | Once the old clasp is off, offer the new one up and mark the holes required for the spikes on the front panel. If you are happy with the position, make the holes (I use a small blade) and push the new clasp on. | |||||||||
| Step 4 | Put the backplate on (I have pushed the spikes right through the lining and held it all in place with the back plate but its your choice) and bend the spikes over, to trap the backplate (and possibly lining) in position. | |||||||||
| Step 4 | Patch the backplate with a piece of material or stitch it up (I have had great results with some thin leather and double sided tape on the backplate). Finished | |||||||||